
Refresh worn exteriors with reliable, high-performance repainting methods, covering prep, priming, and techniques used by trusted residential painting services in Gresham OR.
A faded or weathered exterior doesn’t just dull your home’s appearance—it can also expose your siding to moisture and long-term damage. Painting over old finishes is an affordable and reliable way to give your home new life, but only if the underlying prep is done correctly. This guide breaks down the steps needed for durable, high-performance results and highlights how trusted residential painting services Gresham OR approach the job with care and expertise.
1. Diagnose the Existing Finish
Before touching a brush, evaluate the current paint and substrate. This step helps you understand the root issues behind fading or failure.
What to Look For
Peeling or flaking paint indicating poor adhesion Chalky residue showing sun damage and oxidized paint Rot, cracks, or soft spots on wood Rust or corrosion on metal surfaces Mildew or algae growth, especially on shaded sides of the home
Perform a small tape adhesion test to confirm whether the existing coating can support a new layer.
2. Consider Timing and Safety
Exterior painting requires the right weather and proper safety measures.
Ideal Conditions
Temperature between 50°F and 85°F
Dry weather for several consecutive days
No direct harsh sunlight during painting
If your home may contain lead-based paint, use lead-safe procedures or hire professionals who are certified.
3. Clean the Surface Thoroughly
Cleaning is essential for long-term adhesion. Dirt, chalk, and mildew prevent fresh paint from bonding.
Cleaning Methods
Pressure washing for vinyl, metal, stucco, and fiber cement Soft wash solutions for delicate or older wood Mildew cleaner or diluted bleach mix for organic buildup
After cleaning, allow the surface to dry fully. This creates a solid foundation for a results-driven repaint.
4. Remove Loose Paint and Make Repairs
Old, unstable paint must be removed to avoid future peeling.
Prep Steps
Scrape peeling paint using a putty knife or scraper
Sand remaining edges to create a feathered transition
Repair rotted wood and cracked trim with exterior fillers
Treat rust on metal surfaces and remove any loose corrosion
A well-prepared surface ensures a scalable process—especially for large homes or multistory exteriors.
5. Sanding and Feathering
Sanding helps new paint grip the surface and creates a smooth base.
Sanding Guidelines
Use 80–120 grit sandpaper
Power sanders work well but require dust protection
Feather all edges of remaining paint for an even look
Smooth transitions prevent visible lap lines after repainting.
6. Choose the Right Primer
Primer enhances adhesion and prevents stains or tannins from bleeding through.
Types of Primers
Bonding primer for slick or glossy surfaces Stain-blocking primer for wood tannins or water stains Metal primer for rust control Weathered-surface primer for chalky but stable paint
A top-rated primer makes your topcoat last longer and helps achieve a reliable, uniform finish.
7. Select High-Performance Exterior Paint
Exterior paint quality affects durability, weather resistance, and color retention.
Best Paint Types
Acrylic latex paint for most siding Hybrid or oil-modified enamel for trim and doors
Recommended Sheens
Flat/Matte hides imperfections Satin offers balanced durability and softness Semi-gloss is ideal for trim and doors
Choose a paint with UV inhibitors and mildew resistance to handle Gresham’s climate.
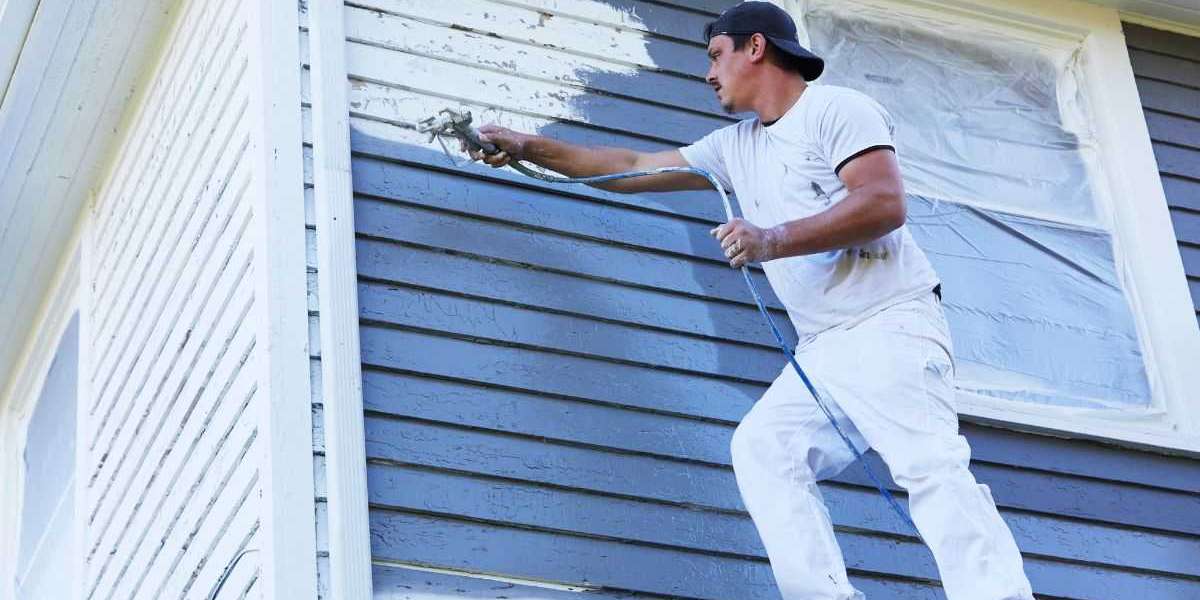
8. Apply the Paint Properly
Technique matters just as much as product selection.
Application Steps
Prime where necessary—full coats, not just spots
Apply
two topcoats for proven long-term performance Use quality brushes, rollers, or airless sprayers
Back-roll sprayed areas to ensure proper penetration
Follow manufacturer coverage rates to avoid thin or overly heavy coats
Correct application ensures an even finish and maximizes longevity.
9. Don’t Skip the Detail Work
Details make a repaint look professional and polished.
Important Finishing Touches
Caulk gaps at windows, doors, and trim
Sand and smooth visible imperfections
Cut clean lines along edges
Inspect surfaces between coats
Detailing enhances curb appeal and helps maintain a consistent, premium appearance.
10. Troubleshooting Common Issues
Even with good prep, issues can arise.
Common Problems and Fixes
Peeling: Remove the affected area, prime, and repaint Blistering: Usually moisture—allow the surface to dry and use breathable coatings Mildew recurrence: Clean thoroughly and use mildew-resistant paint
Addressing issues early helps maintain a reliable, long-lasting finish.
11. Maintain Your Newly Painted Exterior
Consistent upkeep protects your investment.
Maintenance Tips
Inspect siding yearly for trouble spots
Clean exterior surfaces every 3–5 years
Touch up peeling or worn areas
Keep plants trimmed to prevent moisture buildup
These simple steps help extend the life of your paint job and preserve its fresh look.
12. Choosing Residential Painting Services in Gresham OR
Hiring the right contractor ensures quality workmanship and a stress-free experience.
What to Expect from a Well-Experienced Team
Detailed written scope of work
Clear explanation of prep and products
Color guidance
Warranty information
Professional cleanup
A trusted, top-rated painting contractor uses industry-leading products, innovative tools, and dependable techniques to deliver optimal results.
Case Study: Revitalizing a Weathered Gresham Bungalow
A Gresham homeowner contacted Premier Painting Contracting LLC to restore their faded wood siding. The existing paint was heavily chalked, with peeling at the eaves and discoloration from years of sun exposure. The team:
Pressure-washed and removed all loose paint
Repaired rotted trim boards
Applied a bonding primer across weathered areas
Finished with two coats of premium acrylic paint
The transformation brightened the home’s exterior and delivered a durable finish that resisted peeling—even after several seasons of heavy rain. The homeowner praised the team’s reliable communication and results-driven approach.
Materials Checklist
Pressure washer or soft-wash equipment
Exterior cleaner or mildew remover
Scrapers and sanders
Exterior-grade wood filler
Rust treatment and metal primer
High-quality exterior primer
Premium acrylic exterior paint
Caulk (silicone or polyurethane)
Brushes, rollers, airless sprayer
Protective gear
Final Tips for a Smooth, Long-Lasting Repaint
Schedule painting during stable weather, use the right primer, and invest in premium paint. Proper surface preparation is the foundation of any successful exterior repaint—skipping steps leads to premature failure. The goal is a clean, durable finish that performs well and enhances curb appeal for years.